
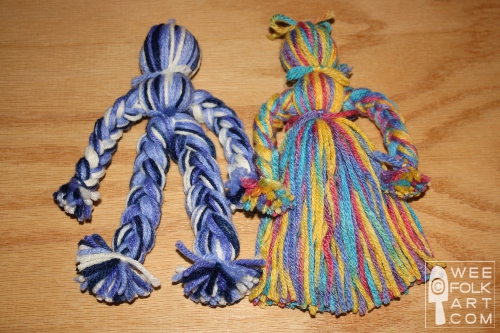
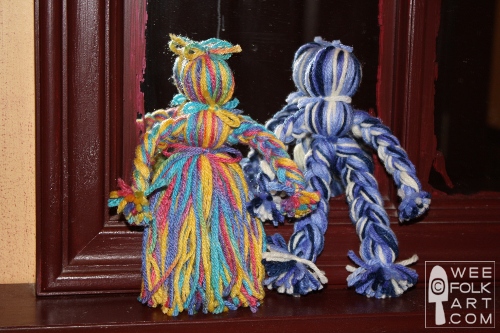
Pioneer Yarn Doll Directions
If you have a skein of yarn and 15 minutes, you can create a yarn doll following these easy yarn doll directions. This is a great craft to share with young crafters, and soon, everyone will be busy creating a community of yarn dolls! Making the dolls is an “ish” thing. How tall you make your dolls will determine how many times you need to wrap the body. My dolls are 7 1/2″ tall. If you want to make yours larger or smaller, just experiment until you find satisfying proportions.
Yarn Doll Materials:
- 4 ply yarn (60-70 yd)
- cardboard, book, lids, etc. for your wrapping board
Girl Yarn Doll Directions:
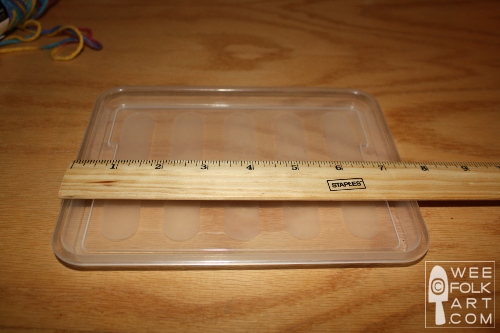
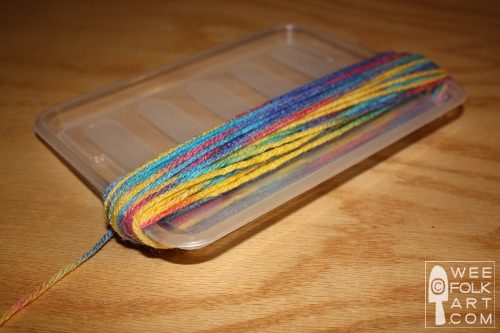
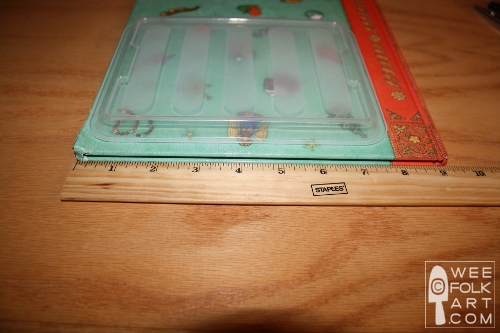
1] Choose a book or lid that is the size of the yarn doll you want to make. You can cut a piece of cardboard to get the exact size you want. Basically, the doll will be as tall as the wrapping board you use.
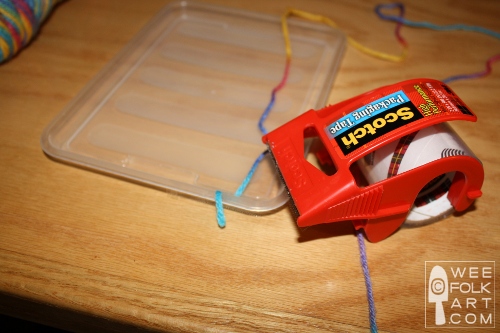
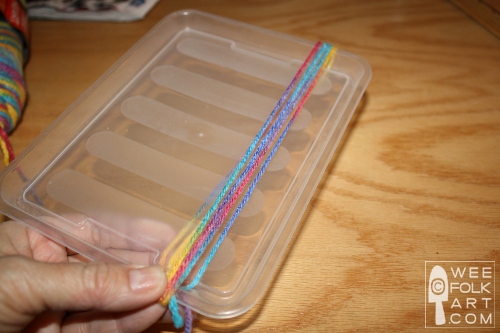
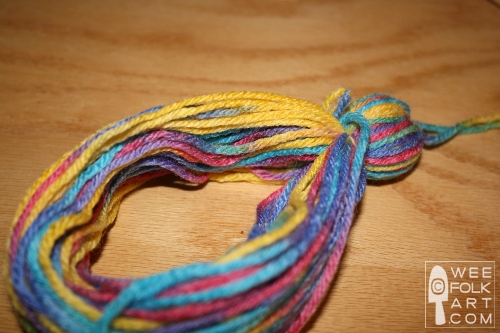
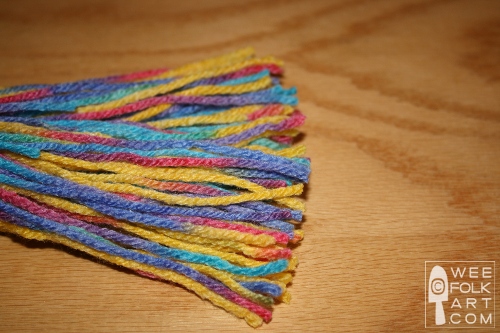
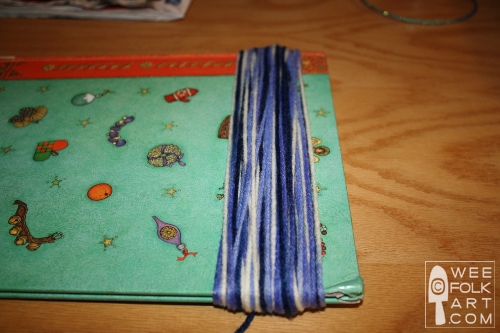
2] Begin by taping or simply holding and end of the yarn at the bottom of your wrapping board. Begin wrapping the yarn around the board. For my 7 1/2″ doll, I wrapped the yarn around the board 70 times. Note: Do not stretch the yarn while you are wrapping or when you remove the yarn from the board, it will “shrink” as it resumes its unstretched state. DO NOT remove the yarn from the board yet.
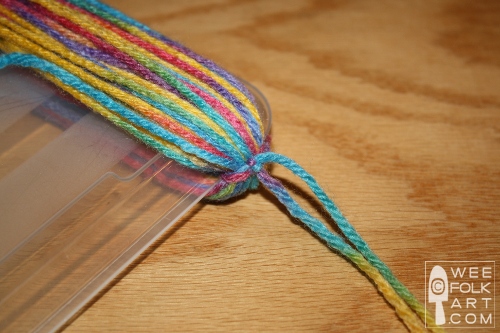
3] Cut a piece of yarn around 10″ long. Slide it under the yarn at the top of the board and tie a tight knot. Young children will some help making sure their knots are nice and tight.
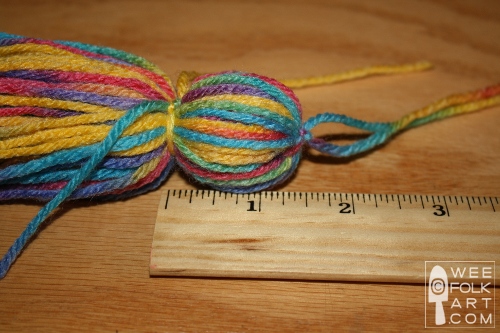
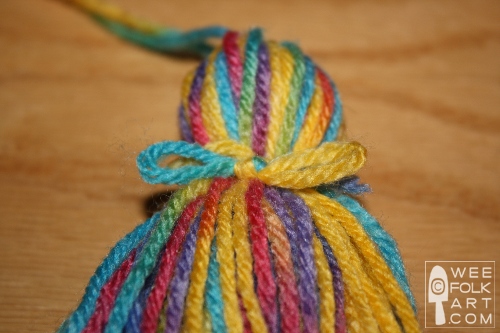
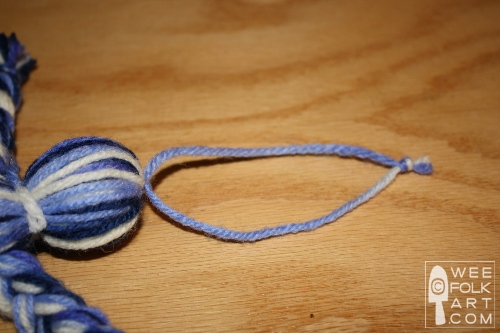
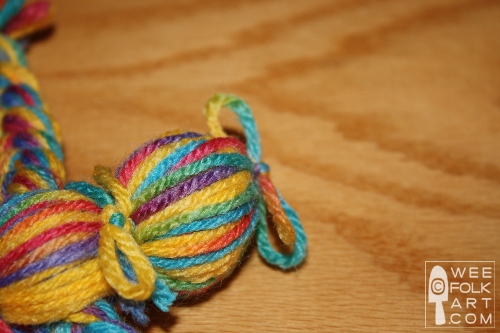
4] Carefully slide the yarn loops off the board. The tied section is the top of the head. Cut another piece of yarn 10″ long. Keeping the yarns straight, and the tie at the top, wrap your piece of yarn around the doll’s neck 2 times. This creates the head and neck. I make my head 1 1/2″ long. Again, tightly tie off the thread on the front of the doll. After you have a secure knot, tie a bow. Then, tie the 2 loops of the bow again to prevent it from untying. You now have a bow at the girl’s neck.
5] To make the arms, wrap yarn around the board 35 times in the same manner described above BUT this time, tie off the yarn 1″ from the bottom of the board.
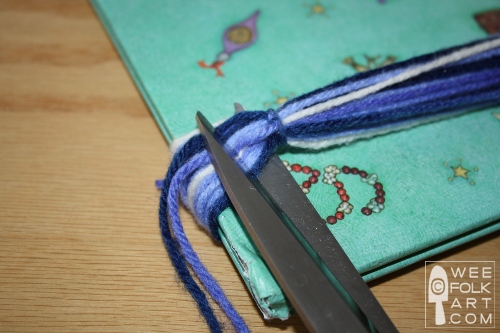
6] Cut the yarn on the front of the board 1/2″ below your tie. The yarn will come off the board. It will not be a series of loops like the body, but rather, it will be a long bundle of yarns.
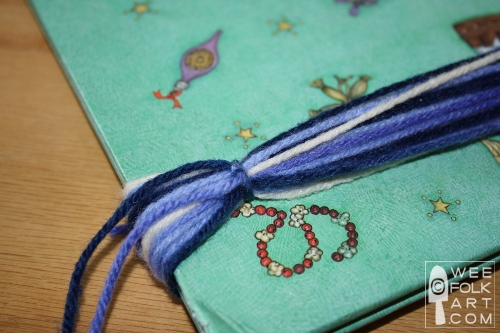
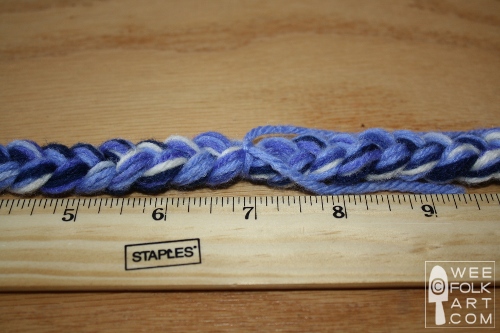
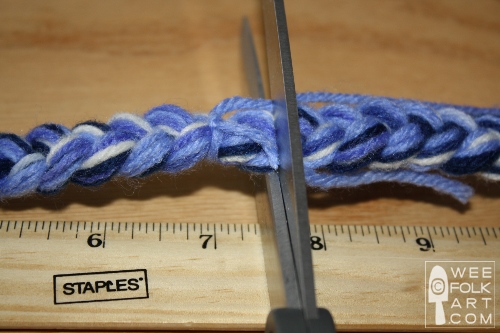
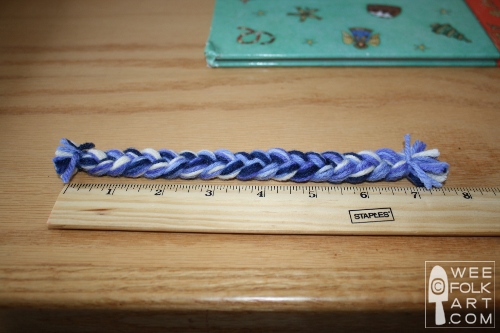
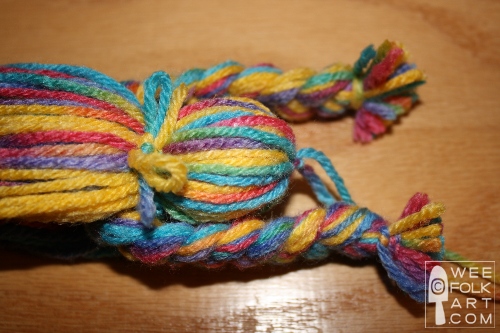
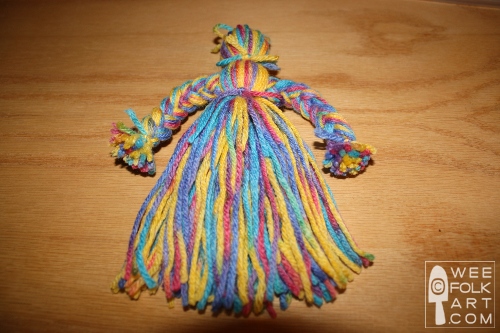
7] Divide the bundle into three sections and tightly braid. Temporarily, tie off the other end. Basically, you want the arms to be the length of the doll. Measure 7″ from the first tie and place another tie on the braid. Cut through the braid 1/2″ away from this tie. Your arm braid should be ABOUT 7 1/2″.
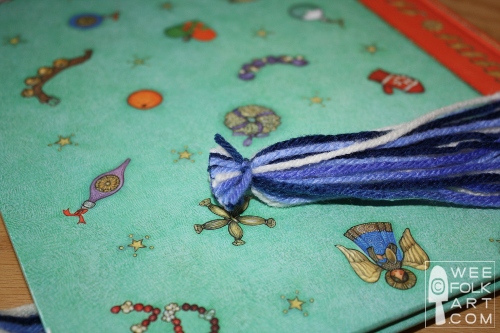
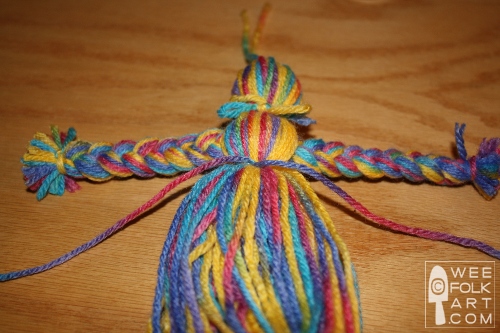
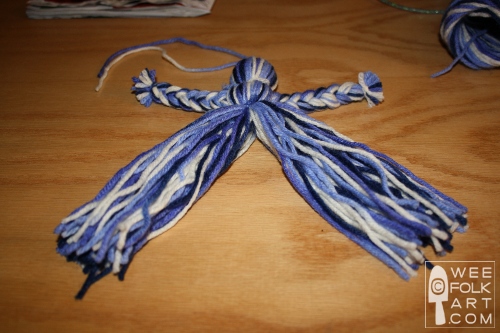
8] To attach the arms, carefully find the middle of the doll’s body and “open” it up.
9] Insert the arms in so the middle of the arm braid is centered between the loops directly under the head.
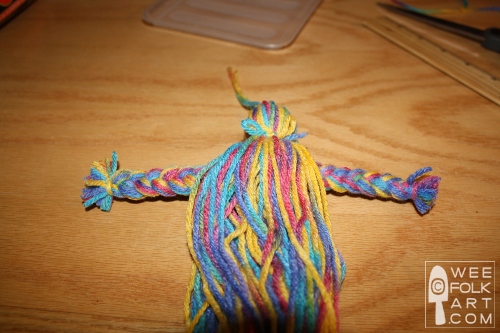
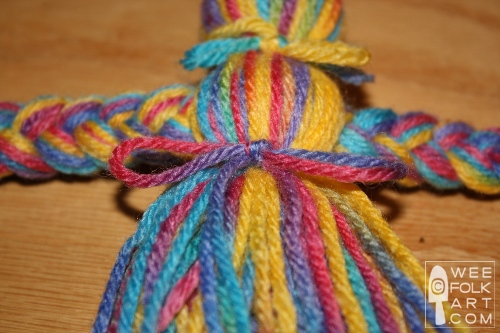
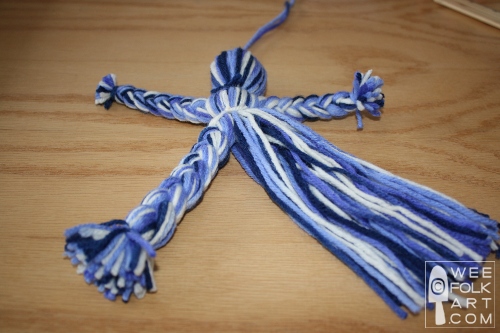
10] Lift the arms over the dolls head to get them out of the way, and tightly tie the body directly under the arms using 10″ of yarn. It is very important to tie directly under the arms so the arms are trapped securely, otherwise, the arms could slide out. Tie on the front of the doll. After you have a secure knot, tie a bow. Then, tie the 2 loops of the bow again to prevent it from untying. You now have a bow at the girl’s waist. Note: If you feel like this knot might not hold your arms securely, turn the doll over, and using a yarn needle, tack the back to the arms, making sure you do not go through the front, and tie off. Hide the thread ends in the doll’s body.
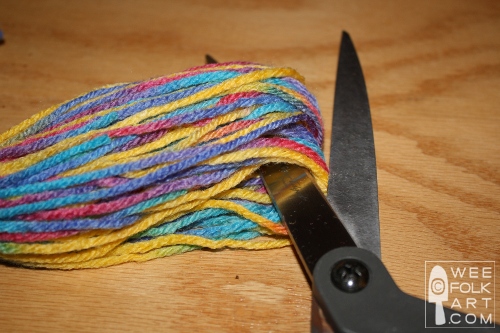
11] Cut the loops at the bottom of the doll’s body.
12] There are 2 ways you can finish the top of the doll. If you want to hang the doll from something, leave the yarn on the doll’s head long and tie to create a loop. If the doll is going to be used as a doll, tie a bow. Then, tie the 2 loops of the bow again to prevent it from untying.
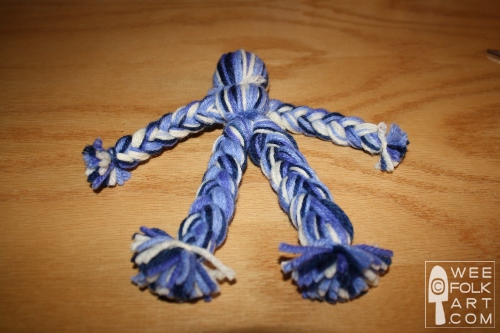
Boy Yarn Doll Directions:
1] If you wish to keep the boy and dolls the same size, you will need to wrap the boy’s body on a larger wrapping board. This is because you will be braiding the boy’s legs, which uses more yarn length than the skirt. I found in making the 7 1/2″ dolls, that if I used a board 9″ long, it made the finished boy measure 7 1/2″.
2] Continue making the doll as described through Step 11. Note: Instead of making bows on the boy, after tying secure knots, I simply cut off the extra yarn leaving 1/2″ ends.

3] To make the legs, divide the yarn into 2 equal sections.
4] Braid each section separately, creating 2 legs.
5] Finish with top as described in Step 12 with a loop for hanging or with the 1/2″ ends.

20 Comments
jackie
ohhh I remember theese. I made them some 50 years ago when I was a kid. We also made octopuses (octopusi??) the same way, only we would divide the yard under the head into 8 even “legs” and braid them to make the octopus’ legs.
I love your blog…I am using many of the ideas with my mom who has alzheimers to help her remember seasons, and as craft projects to keep her brain busy.
Kimara
I remember making the octopi when I was young. We all had a giant one on our beds! Did you also have trolls and make outfits for them? Another favorite pastime.
I also have an aging parent with frontal lobe dementia, but much the same as Alzheimer. The only activity he still does is puzzles and watching baseball. Earlier on, I put together a game for him. I got pictures off the net of the old movie starts from his youth. I put 4 on a piece of cardstock, and cut them all the same size. He would go through the deck and try to remember their names. I put the names on the back so he could self check himself. He used those cards for a couple of years.
I am so pleased to know, that in some small way, we are providing help to your family 🙂
Heather Mac
Thank you for your wonderful, simple and well explained yarn doll tutorial. We just finished “rowing” the book They Were Strong and Good. The book takes place during the Civil War. I used this activity at home with my dd. We discussed toys during the Civil War period and how fortunate a child was to have a toy. It was far between when people were able to get the materials they needed. She felt even MORE fortunate to have her pair of yarn dolls. We enjoyed this crafting time together. We will be definitely using more of these wonderful folk art craft tutorials. Thanks again.
virginie
While these look familiar, I don’t remember having one as a child.
My boys and I made these this afternoon and they LOVE them. My little one (2.5) was concerned that the girl did not have legs, so we made her skinny ones from part of the skirt ;o)
Thank you!
Kimara
Hehe! As parents we certainly learn how to adapt, don't we 🙂 Glad you enjoyed making them with your wee ones.
Jonell C
Wow, what a blast from the past. My Grandma Holly used to make these dolls and shared them with my sister and me. She had them decorated in many different ways, placed all over her home. Years later I wanted to make some but she couldn’t remember how. Now you have shared a wonderful tutorial to share with all of us. I belong to a wonder quilt guild and we make quilts to children. Recently we were asked to also submit handcrafted toys, dolls, and such, to give to children in ‘high risk’ situations. It can be so comforting for a child to have something to hug and hold when they are upset. Thank you so very much. I feel like Grandma Holly is right beside me making these little boy and girl yarn dolls. I have tons of yarn now that I have gone onto quilting. Now onto making my first girl doll.
Huggles Jonell
Sacramento, CA
Regina
My grandmother and great grandmother taught me to make these when I was young. I had them in different colors and sizes (about a village worth haha) some they made for me, and some I made myself. I LOVED playing with them and they were so easy to carry around. I made moms, dads, children and even tiny babies. Thanks for the reminder.
Trish
This is a cute donation idea. It would be simple and easy to make and in-expensive. I plan on makeing a few dozens of these for donations to a hospital my son was in for xmas time. I may even print it out and send it to my therapist, she can get the kido’s involved in making some during therapy. Thanks for the idea. They are adorable. I don’t remember having one as a kid. but i think its time to bring them back to life! I may add some wiggly eye’s to it just to make it look more like a doll.
Kimara
Wonderful giveaway for young hospital patients. It would be an awesome craft for those children, too. Plus, you could probably get TONS of yarn donated for the project. We all have stash yarn that really isn't enough to complete a project, but you can make these dolls. Thank you for sharing your heart with so many children. We are delighted to have helped, even in this small way.
((hugs))
Trish
I felt I needed to give something back to the children’s hospital he was in. We were in the hospital during this past xmas time because he has a heart condition and there was an infection in his heart that needed iv antibiotics. We were there and he got two big bags full of toys. they made it a point to come ask me what he would like so we could get things he liked. Anyway. I was so thankfull that I promised to bring something for next year at xmas time. I wanted to find something easy to make that would be from the heart. I saw this and it just jumped at me. How cute was this to make and give to many children that is stuck up at a hospital during the holidays. So I will try to make as many as I can, and if not get people to help me make these. I think I found one friend that would help me and she will get others she knows to help. But could really use some help. I would be willing to trade off for these lovely dolls with jewelry that I make. I also plan on making jewelry for the mom’s of these kids so they won’t feel left out. so if anyone wants to help donate your time and a few dollars for the yarn. even if its five or ten. That would be so great and appreciated. I am looking to give the hospital at least 50 to 100 items. that’s how many are there during the holidays. many are baby’s. So if there’s anyone out there that would be reading this and have an act of kindness. Please help. You can contact me at trishbroussard70@yahoo.com. Thanks again. Trish
Trish
I took the girl doll idea one step more and made legs under the skirt by just using part of the hanging string under the first layer. so it looks like she has a skirt on with legs.
Meaghan Jackson
We just made these today. My son and daycare child did a lot of the work, they are 4.5 years old. I lost their attention for a while, but they are so proud of their work and love the little dolls. Thank you for the wonderful explanation.
Crystal
Thank you so much for sharing this pattern. It is one of the better yarn doll patterns in my opinion. I can’t wait to start making them. Thanks for sharing this!
Lindsay
My boys and I are going to make some this afternoon! What is that lovely book you wrapped the yarn around?
Kimara
You know, I’m not actually sure which book it is. I’ve got our Christmas books packed away until the holidays. If I get a chance I’ll try to go through it over the weekend. I do know it is an older book… probably at least 20 years old, but I’ll check as soon as I can. Have fun making the dolls. Feel free to share a photo on WFA’s Facebook page. Would love to see them 🙂 ~Kimara~
eion
make it read to you!!!!!!!!!!!!!!!!!!!!!!!!!!!!!!!!!!!!!!!!!!!!!!!!!!!!!!!!!!!!!!!!!!!!!!!!!!!!!!!!!!!!!!!!!!!!!!!!!!!!!!!!!!!!!!!!!!!!!!!!!!!!!!!!!!!!!!!!!!!!!!!!!!!!!!!!!
Kelsey
If doing this with a class, about how much yarn would each child need?
Michelle ~ Wee Folk Art
I did some quick calculations and I believe you would need about 60-70 yards of yarn per doll, if you make them the same size as we did. Take the size of your wrapping board in inches and double it. So a 7 1/2 in book takes a 15 inch piece of yarn per wrap. You will need to wrap 70 for the body and another 70 times for the arms. So take that wrapping board number and multiple by 140 (the total number of times you will need to wrap). Then divide by 36 to get yards. Add an extra yard or two for the tied pieces. Remember that the boy doll will take a bit more because the base body is wrapped around a longer board.
Pingback:
Kelsey
Thanks so much!! That is VERY helpful!