Book Mark Directions - Pussycat

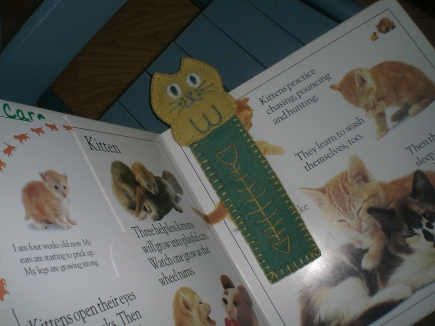
Make this book mark for a stocking stuffer or a token gift for a friend who loves to read. It's quick, it's easy and it's cute...definitely my kind of project. Enjoy!
Materials:
8” x 4” piece of wool felt for book mark
4” x 6” piece of wool felt for cat
Felt scraps for eyes and tail
Embroidery floss
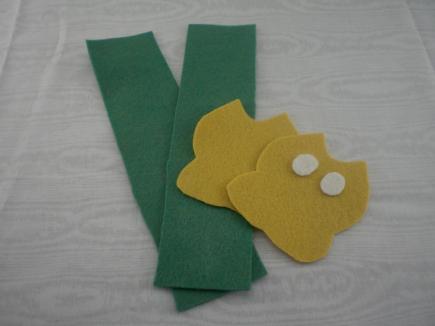
(PLEASE NOTE: I did not decide to add a tail to the cat until I was finished with the book mark. Let's just say the tail is an "aftermarket" addition! The pattern is correct but the pictures below show a couple of steps out of order and the tail is not included in the photo of the cut out pieces. Follow the written directions and you'll be just fine!)
[1] Copy pattern and cut out pieces of felt; 2 book mark pieces, 2 cat pieces, 2 eyes, and 1 tail.
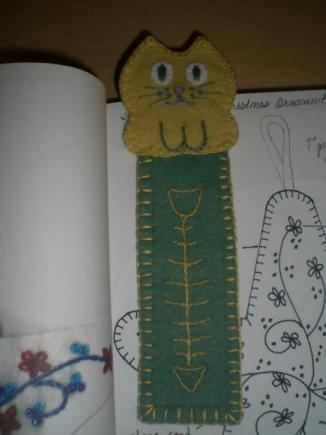
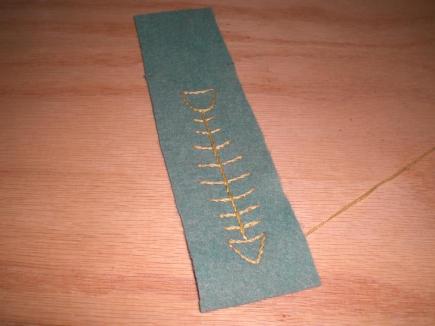
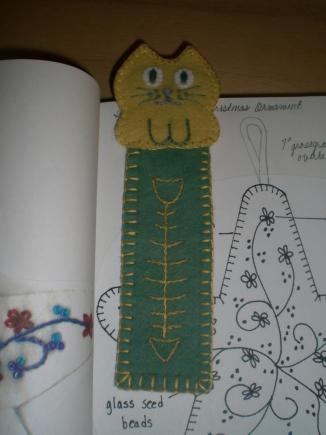
[2] Transfer fish design to front book mark. Stem stitch design using 6 strands of embroidery floss.
[3] Pin front to back of book mark so fish design is on the outside. Referring to pattern, blanket stitch the sides of the main part of the book mark using 6 strands of floss. Use running stitch and 3 strands of embroidery floss to sew together the top portion of the book mark.
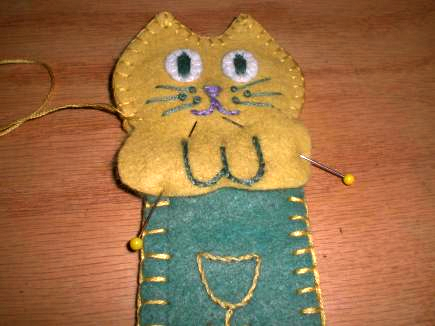
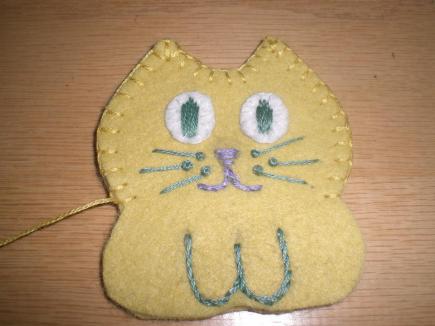
[4] Position eyes to cat front and using 2 strands of embroidery floss, blanket stitch in place. Transfer facial features and legs to cat. Refer to pattern and photos. For specific stitches: satin stitch irises with 3 strands of floss, satin stitch nose with 3 strands of floss, stem stitch mouth with 6 strands of floss, straight stitch whiskers with 3 strands of floss, French knot follicles with 3 strands floss, and stem stitch legs with 6 strands of floss.
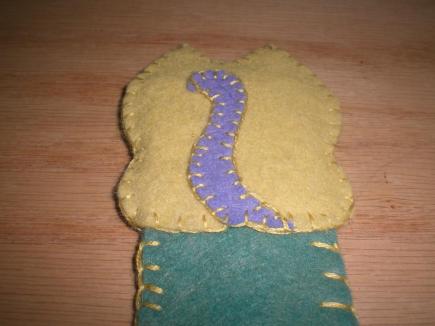
[5] On the back, attach tail to back with a blanket stitch and 3 strands of floss.
[6] Using the pattern as a guide, and with wrong sides together, stitch front to back using 3 strands floss and a blanket stitch. (Note: Stitch the top part of the cat’s face and head together between the stars on the pattern. Leave the bottom open.)
[7] Slip the book mark into the cat’s head as shown on the pattern. The running stitch on the book mark should be covered completely, with only the blanket stitch showing. Pin in place.
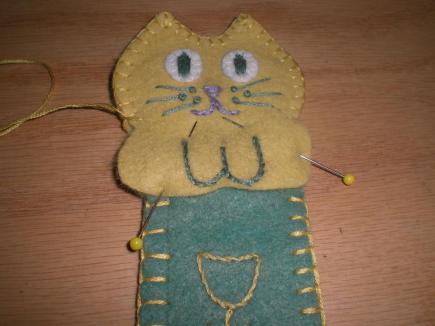
[8] Continue blanket stitching the front and back together. When you reach the book mark, blanket stitch across the front only, do not go all the way through to the back. Finish attaching the front to the back.
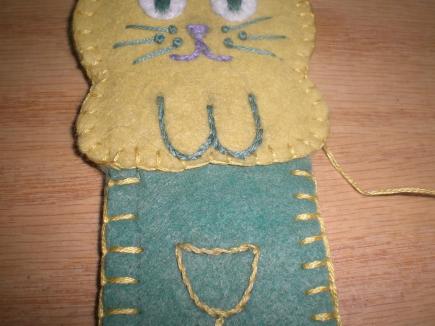
[9] Turn the book mark over and blanket stitch the back of the cat to the book mark making sure you do not go all the way through to the front.

Copyright@Wee Folk Art 2008. All rights reserved.


Comments
Tail
I just noticed the tail on the back. I love it! That makes it purr-fect. I'm not a cat-person, but I might need to make one of these for cat-lover friends in my life.
Tina
My crafty blog, http://squirrelacorns.wordpress.com
Just an after thought...
When I first designed the cat, it didn't have a tail. But as I was finishing up the project I thought it needed one. Thus, the note in the directions...the first few pics are actually missing a tail, but low and behold, at the end...a tail! Anyway, I am much more a dog person than a cat person, but I do love this kitty. I was also chided for NOT making a dog...so I have one a paper...as soon as it turns into a bookmark, I'll share.
Kimara
Wee Folk Art Publisher
What a cute bookmark. I
What a cute bookmark. I think everyone on our Christmas list will be getting a personalized bookmark next year. I have a lot of ideas turning around in my head now. Yahoo!
Christi
A head full of ideas!
Thanks! If there's one thing we'd like to accomplish that's sparking creativity. It's always a hope that someone will start with our ideas and make them their own. And, hey, the best time to start thinking about NEXT year's gifts, it's right now! Hope we can continue to offer ideas that you enjoy! Merry Christmas!
Kimara
Wee Folk Art Publisher
Thanks for the bookmark idea
Thanks for the bookmark idea too! I didn't make a theme bookmark, instead I cut out a piece of cardstock the same size as the bookmark that I wanted to make and had the boys draw a picture on the cardstock. Then, I transferred it to the felt, and embroidered their drawings to make bookmarks for Grandma and Grandpa. They turned out great!
Tina
My crafty blog, http://squirrelacorns.wordpress.com
Bookmarks!
Would love to see them! Did you take pics? I went to your website and didn't see them, but, WOW... I'm away from the computer for a week and I have so much catching up to do. Can't wait to find a few extra minutes and catch up at your blog...so many wonderful things going on at your house this holiday!
Kimara
Wee Folk Art Publisher
Thanks
Grandma and Grandpa are still here, so I am going to take pics of them before they leave. I was just thinking that as I was posting the message here that I forgot to take pictures of them before I wrapped them up. I want to take a side-by-side of the one the kids drew and then how it turned out. I was going to embroider one of the boys' drawings and turn it into a wall hanging for Grandma, but the bookmark is even better actually. 1) smaller and quicker, and 2) something they'll actually use and look at frequently as opposed to hanging on a wall somewhere. I might still do the wall hanging though one day.
Tina
My crafty blog, http://squirrelacorns.wordpress.com