-
Craft Sticks Winter Puzzle Craft to Do with Kids
In three days we went from -17 degrees F to 48 degrees F. Despite this “warm” weather after the polar vortex, we know we are no where near the end of winter. So, we are…
-
Watercolor Snowflake Craft
Baby, it’s cold outside! Normally that is something you just hear in the northern states, but today it seems to be cold all over the country! Going with that old adage… If life gives you…
-
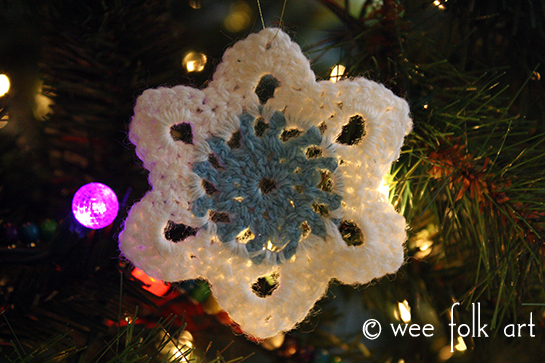
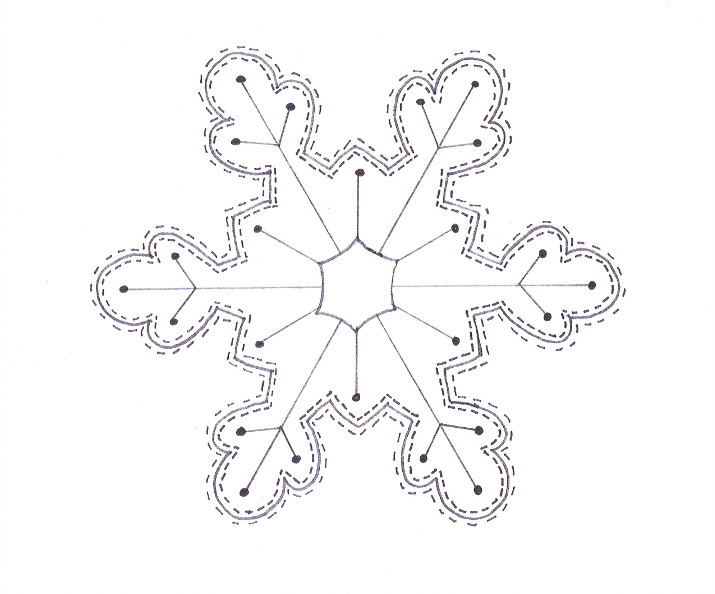
Retro Crochet Snowflake Ornament Pattern
As a kid, my Nana always had these hand crocheted lace snowflakes on her tree. Her mother-in-law (my great-grandmother) had made them. They were delicately made and starched until they were firm. There was definitely…
-
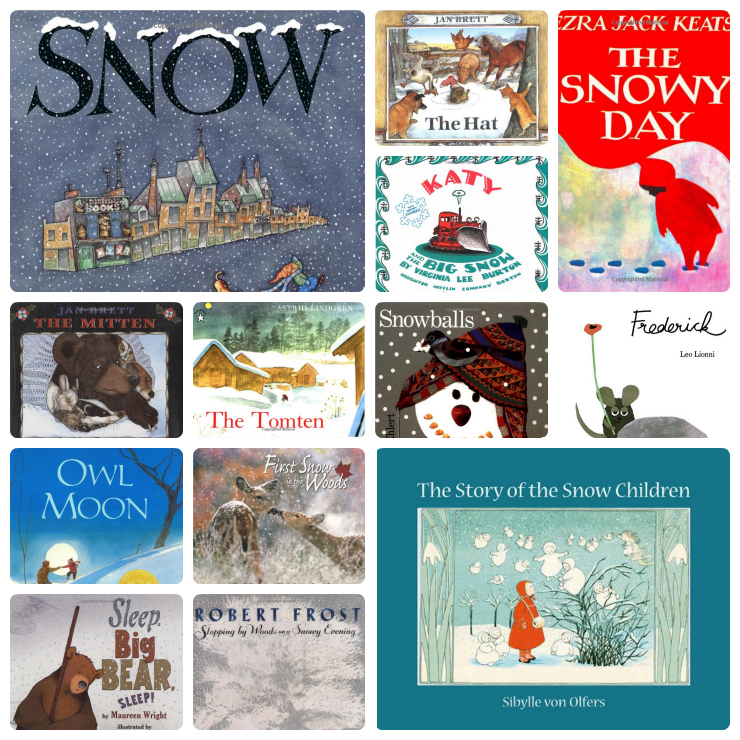
Favorite Winter Books for Children
I have always been a lover of children’s books. Of course I loved them as a child, but I also continued to collect them as a teen and young adult. By the time my children…
-
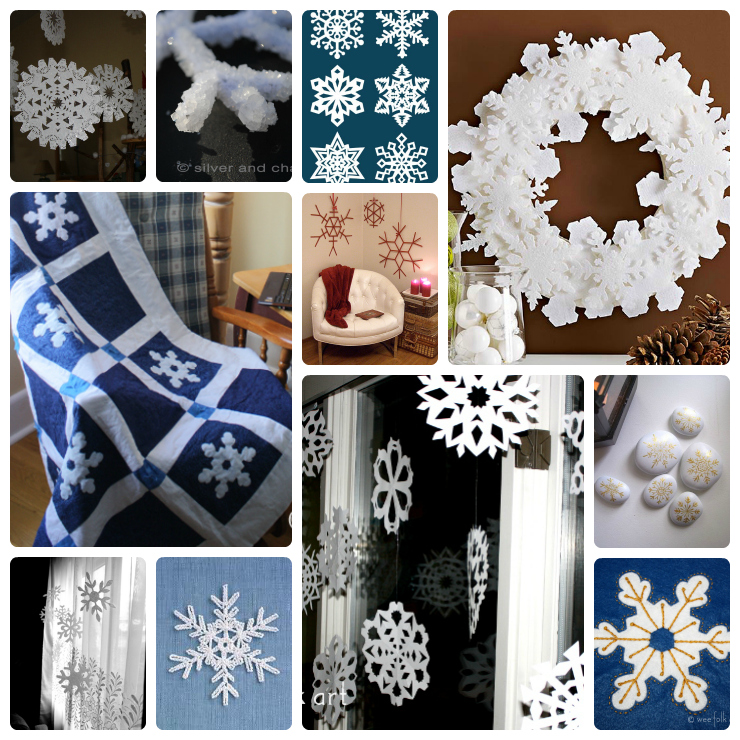
Snowflake Crafts
Tucking away all my holiday decorations is always a bittersweet experience. On one hand I’m ready to return my house, and my life, to some semblance of order after the chaos of the season, but…
-
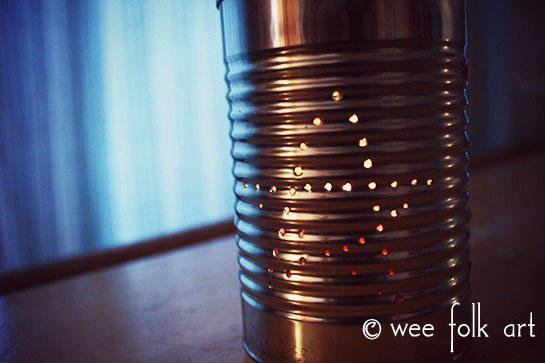
Punched Tin Can Lantern Directions
One of the projects in our Winter Wonderland unit is to create a punched tin can lantern. My kids loved this project when they were little, Bug especially enjoyed hammering holes all over his can.…
-
Snowflake Coloring Page
THE SNOWFLAKE by Kimara Wise You flit, you fly, your float around, Before you settle on the ground. Unique you are from all the rest, You take your place on nature’s breast. Although you disappear…
-
Winter Tree Coloring Page
Winter Trees by George Szirtes Aren’t you cold and won’t you freeze, With branches bare, you winter trees? You’ve thrown away your summer shift, Your autumn gold has come adrift. Dearie me, you winter trees,…
-
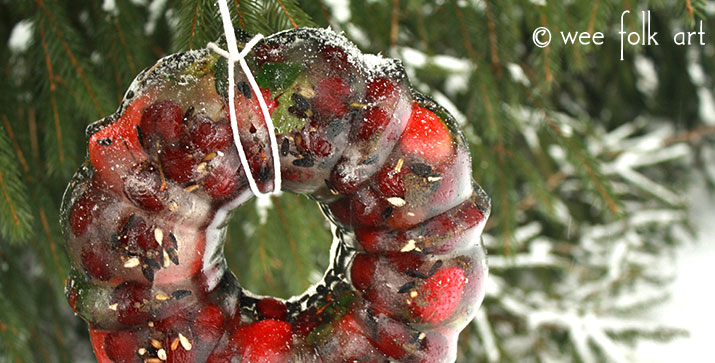
Frozen Fruit Ring Bird Feeder Directions
This is an easy and fun project to do with the kids. In our Winter Wonderland unit we encourage feeding the birds and include several different bird feeder crafts in the activities. This Frozen Fruit…
-
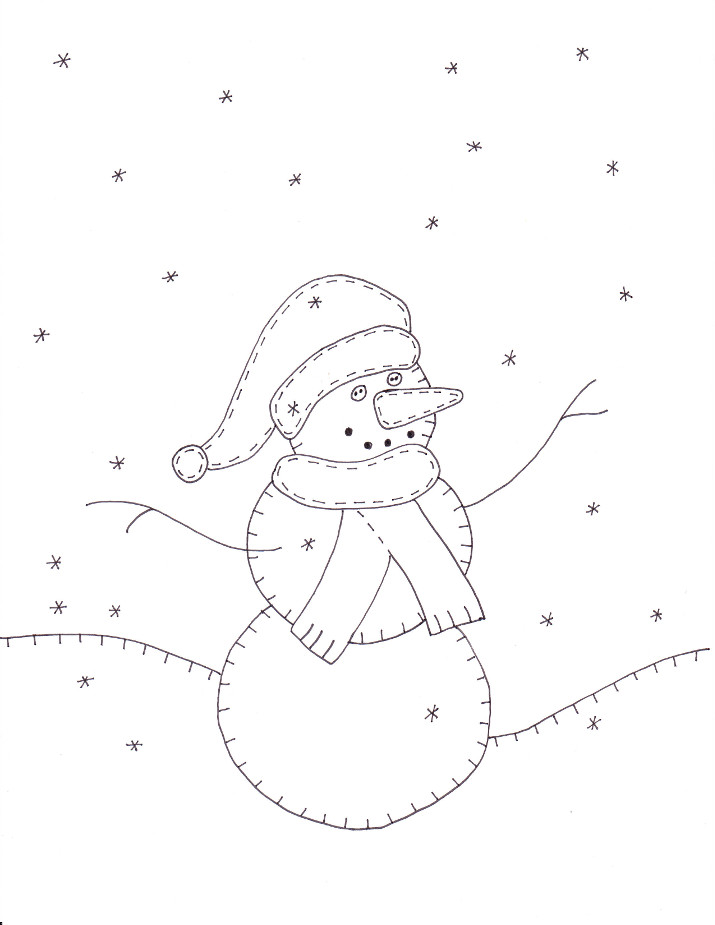
Happy Snowman Coloring Page
“In the meadow we can build a snowman, And pretend that he is Parson Brown. He’ll say are you married, we’ll say “No man”. But you can do the job when you’re in town.” from…
-
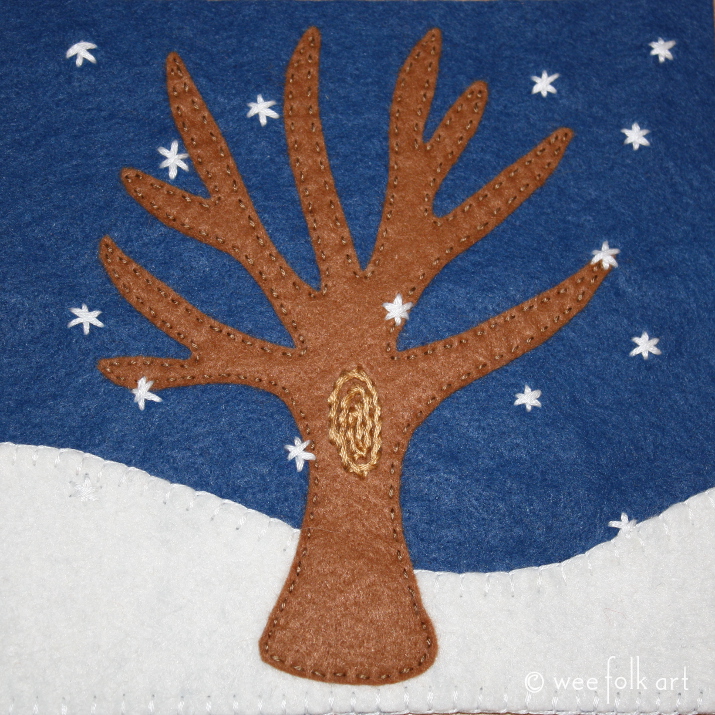
Winter Tree Applique Block
Today we are sharing our Winter Tree Applique Block. Although it may seem rather stark and boring, I can relate to our leafless winter trees, contently hibernating, yet at the same time preparing for their…
-
January Applique Blocks
There was no white Christmas this year. Those of us that live in the Northern United States, like Michigan, tend to feel cheated when our Christmases aren’t white. It’s what we’ve come to expect after…
-
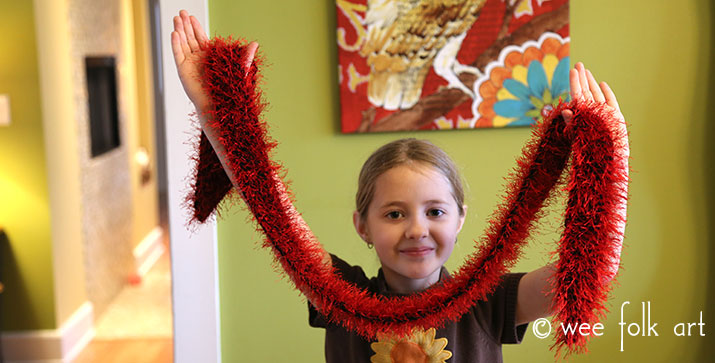
Fuzzy Boa Scarf
A few years ago I wrote a post called The Song of a Scarf in which I showed how I spun, dyed, and knit a scarf from beginning to end. It included a pattern…
-
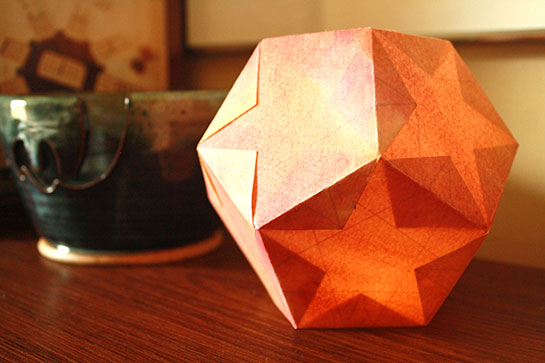
Watercolor Paper Star Lantern Project
This time of year, when there are far more hours of darkness than light, I think we are all drawn to the warm, comforting glow of candles and twinkle lights. Last week I shared a…
-
Brrrr… Cold Day Project :: Mitten Line
It is bone chilling cold out there today! Our schedule has been cleared, all activities for the day have been canceled due to extreme wind chill. What to do on a snow day that is…
-
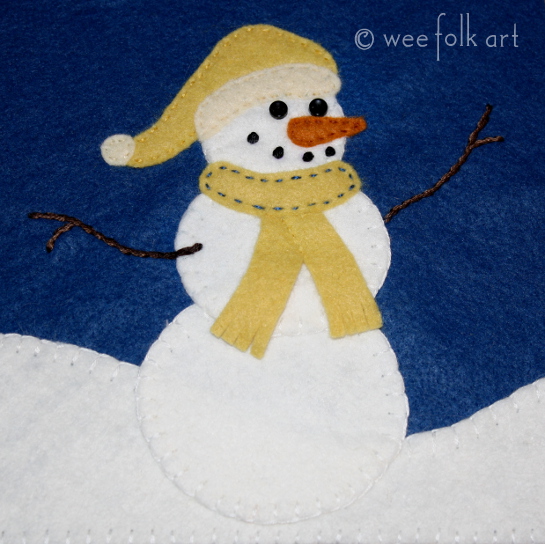
Happy Snowman Applique Block
“In the meadow we can build a snowman”. Oh, how I love our “Winter Wonderland”! There can be the slightest sprinkling of snow and wee ones will be outside, carefully scooping up what precious little snow…
-
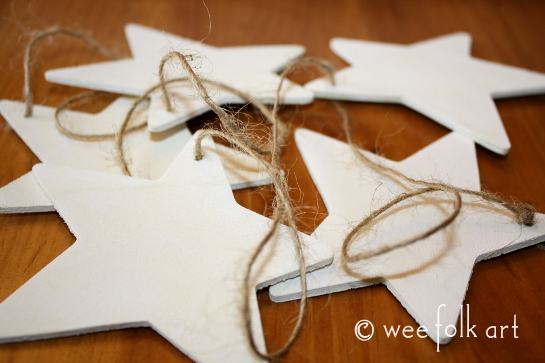
Wooden Christmas Stars
You would think, after 59 Christmases, I would run out of new things to make. HA! Not even close! Over the years my tastes have changed, and as they do, my house changes with me. My…
-
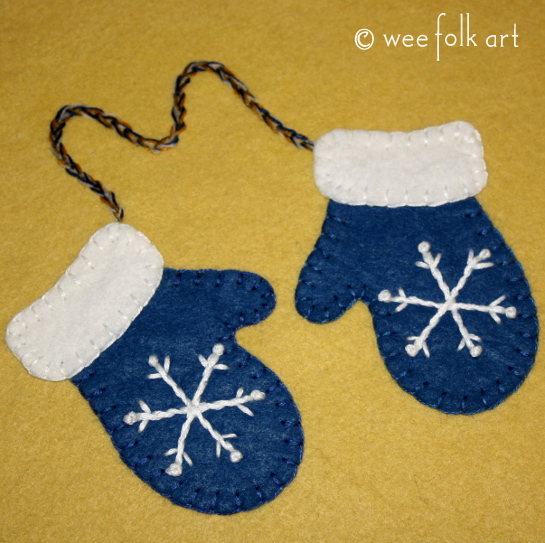
Warm Woolen Mittens
“Raindrops on roses and whiskers on kittens, Brighton copper kettles and warm woolen mittens.” When Drew Drew Buns (the inexplicable name I called/call my youngest) was 4 years old, he came in from the season’s first…
-
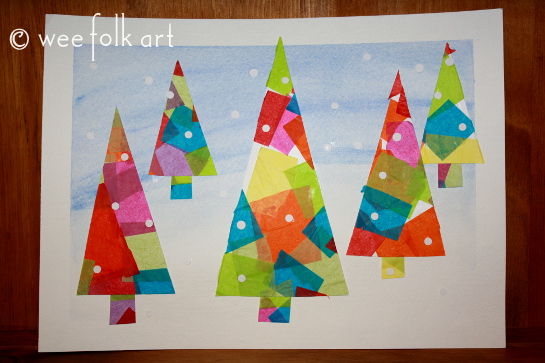
Winter Tissue Paper Trees
The other day on Facebook I shared a link to a posting for handmade Christmas cards on Back to the Drawing Board. The designer made a landscape using tissue paper trees, had them reduced and photo coped, then used…
-
Snowing Indoors
(Our new snowflakes) A few years ago I shared a tutorial for making snowflakes out of dollies. You can find that tutorial HERE. Originally, I had made them to hang in my preschool, so I…
-
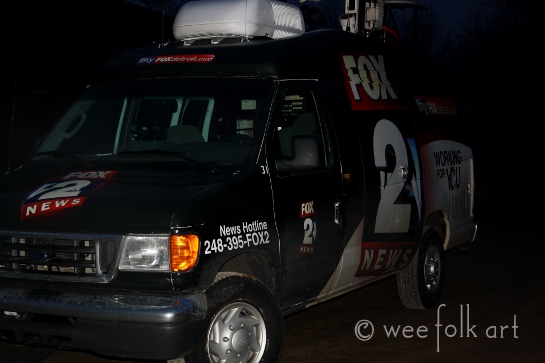
Groundhog Day Celebration
EDIT: We found out Bug actually was on the news as a live report. His daddy and co-workers saw him, although it wasn't recorded. Michigan's official groundhog is named Woody. As it turns out, Woody is not a he, Woody is…
-
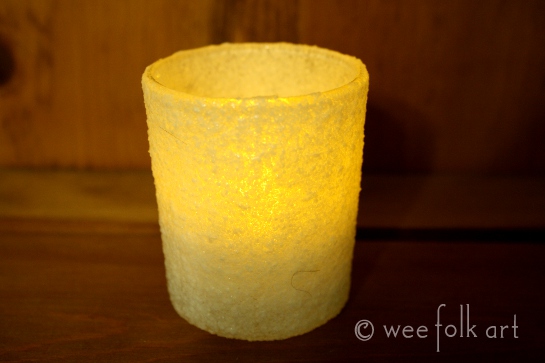
Candlemas Kosher Salt Candle Holders
This year for Candlemas, I REALLY wanted to make some snow candles. But, alas, it is raining, there’s never been more than 3 inches of snow on the ground at a time, and for the first time in my lifetime, there isn’t a…
-
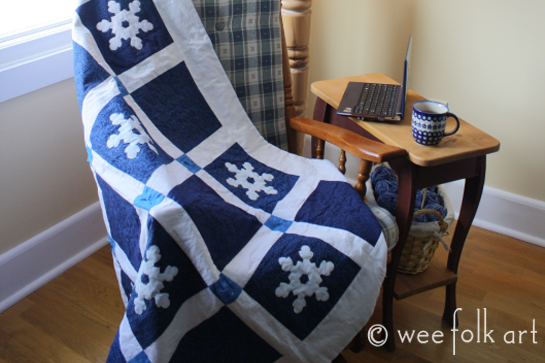
Stenciled Snowflake Quilt Pattern
Here are the directions for turning those freezer paper stenciled blocks into a toasty warm blankie. Of course, you are welcome to make up your own quilt pattern, too. Just a head’s up, this isn’t a step-by-step tutorial…
-
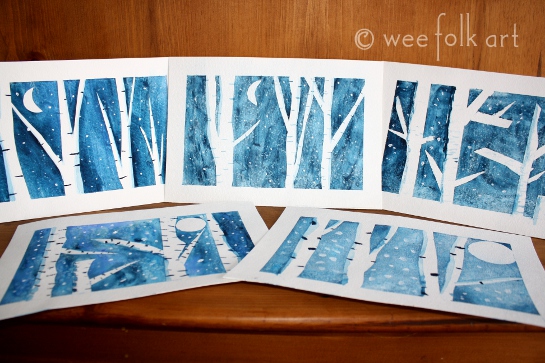
Winter Birch Trees
Have you ever been to Art Projects for Kids? If not, run there, right now, but be prepared to stay for a long, long time. Kathy Barbro is an experienced and gifted art teacher, and she shares over 600 projects on her…

Patterns & Crafts